Looking to install a new garage floor or repair an old one? Have a read of our hints and tips on how best to do it.
Whether it’s for a new build or a renovation, laying a garage floor isn’t as hard as you’d think. Floor screeds help keep floors level and are ideal for creating a solid base for your garage. During any kind of home refurbishment or development, one of the most important stages of laying a new floor is the application of an appropriate floor screed. As the final layer before a finish is applied – or if you leave it without one – it’s important to get the application right first time, otherwise a poorly completed job could end up costing you more in repairs in the long run. So, how do you install a new garage floor?
First things first, repair any damaged areas
If you find that your current garage floor is damaged with holes, cracks or broken patches that are larger than 20mm in depth and less than 2 meters wide, you can fill them with an application of weberfloor base rapid 4360screed. This should be allowed to harden and then primed before the application of your final floor screed. If there are any irregularities in the substrate under 20mm in depth you can fill them with the same floor screed you’re planning on using to lay your garage floor.
Preparation is key
Before laying your floor you need to make sure that the substrate is clean, free from dust, grease, oil deposits or other impurities that might prevent adhesion – this may mean undertaking some sand/grit blasting.
It is advised that you apply a primer such as weberfloor 4716 primer to the substrate to improve the flow and adhesion of all cementitious and hemi-hydrate floor screeds. Using a long-handled yard brush, it requires two coats spread in opposite directions, with 3-5 hours allowed in normal conditions for drying in-between coats.
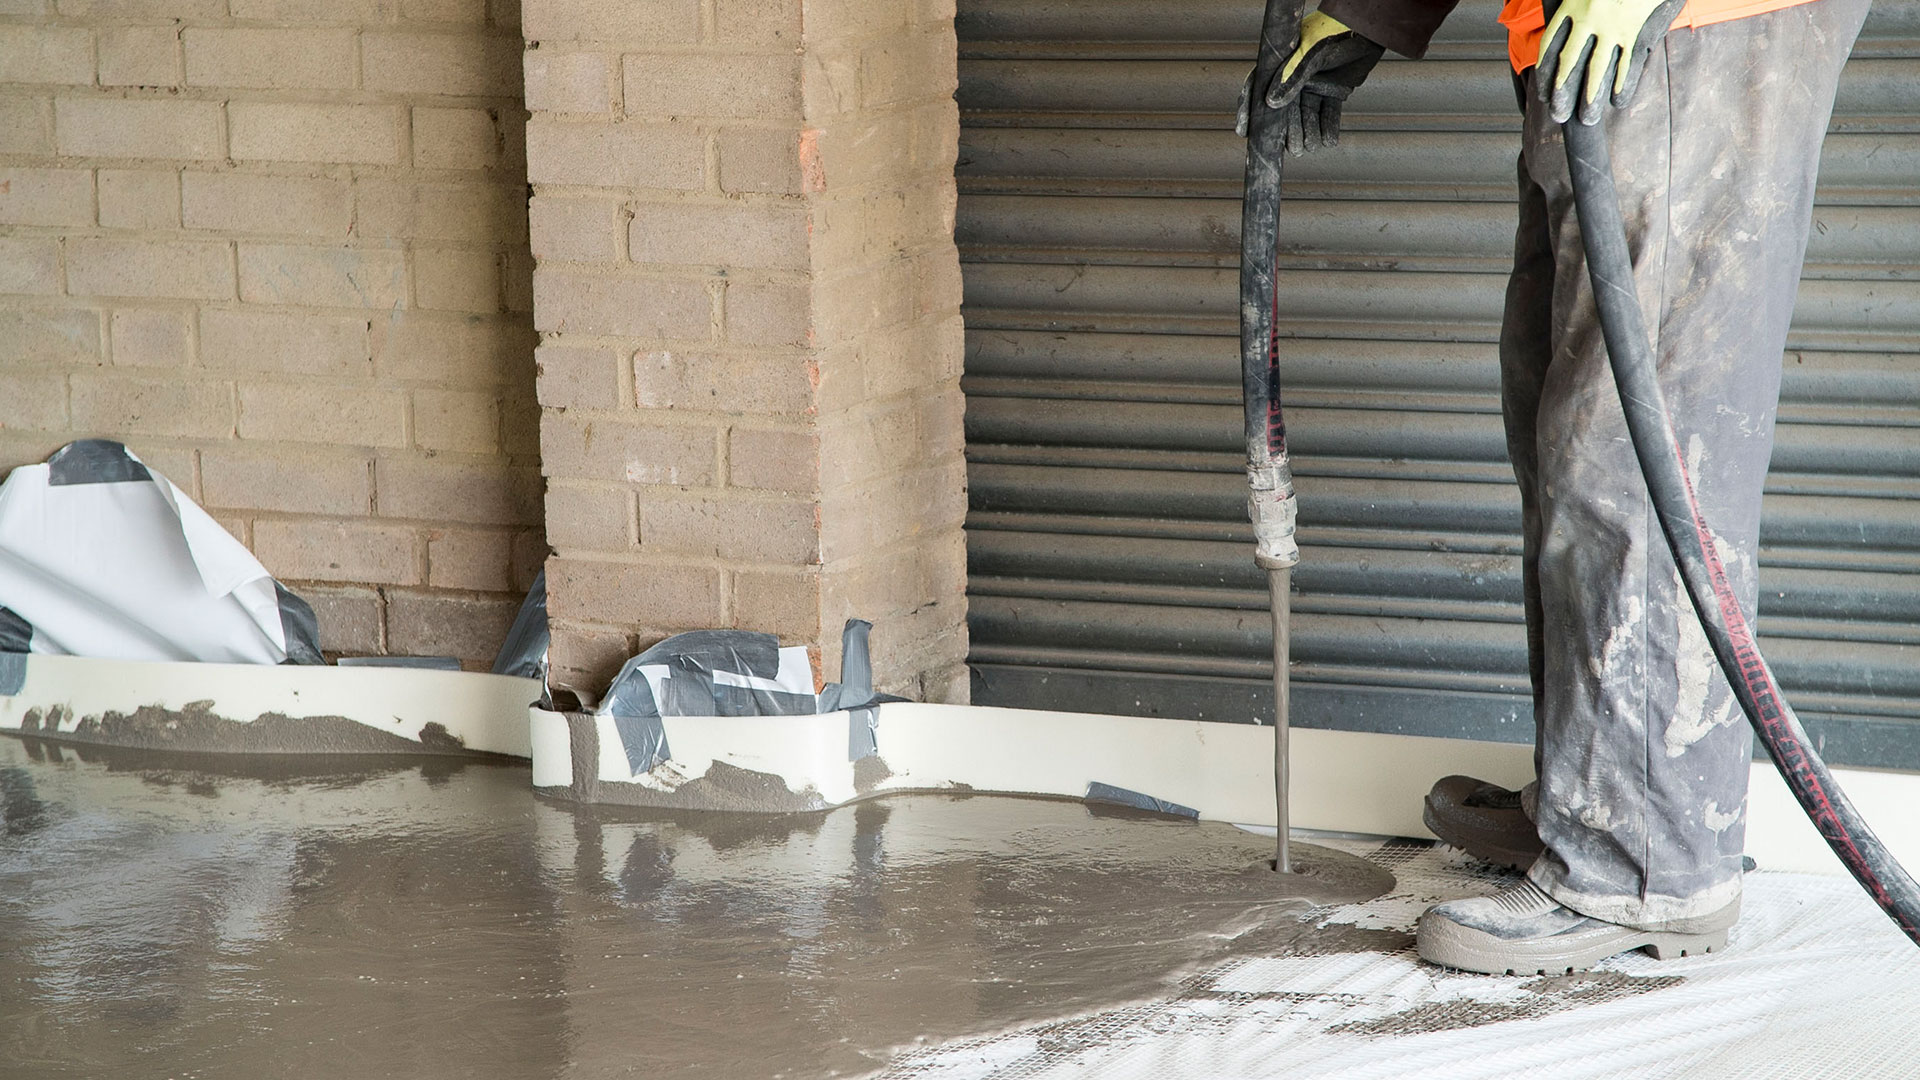
Laying the floor
Start by laying a perimeter foam measuring at least 6mm. Then position two or three 15mm battens (depending on the width of your garage) on the substrate running in the direction you plan on laying the screed. Starting at the wall furthest away from the door completing sections of about 600mm at a time, layer weberfloor industry pro top 4610 – a premium self-smoothing industrial floor screed which can be applied by pump or hand – up to the level of the top of the battens. Continue across the floor until the whole area is covered.
Straight after application use a spiked roller to remove air bubbles. Do not revisit the screed with the roller after initial pouring as this could result in marks being left in the floor.
Light foot traffic is possible after 2-4 hours in normal conditions. After 24hrs, it will be ready for you to drive and park your car on it.
Get in touch
At Weber, we’ll be more than happy to advise you on how best to go about laying a new garage floor or repairing an old one. Get in touch with our Technical Team by emailing [email protected] or by calling (01525) 722110 and selecting option 2.